
Shout out to “big brother” this is my disclaimer* for any and all product or payment received, and or affiliate links in this and all posts.
![]()

Homemade Moist Banana Bread Recipe
If this is your first visit to LeahSay’s Views, Welcome and I hope you come back often. If you’re a regular visitor here, I’d like to take a moment to thank you for being a loyal fan and follower.
I just happened to walk past the bananas I had purchased a few days ago in anticipation of a visit from my granddaughter’s, the little one loves nana’s. Well, needless to say, they were looking a little sad. And by sad, they were covered in brown spots. And I will not eat them if they have event one tiny spot on the outer peel. So what’s a LeahSay to do. Why bake up a quick batch of moist banana bread.
Ingredients:
I had 4 average sized bananas
1 stick of soft butter (I prefer butter)
2 eggs
1/2 cup of homemade buttermilk. I teasing you can use store bought if you have it. I place my 1/2 cup measuring cup on the counter and pour in one tablespoon (eyeball it) and then fill the measuring up to the top with cold milk. Let this sit while you gather your ingredients. Ta Da, homemade buttermilk.
1 cup of loosely packed brown sugar
1/3 cup white sugar
1 teaspoon of real vanilla extract
1 teaspoon baking soda
1/2 teaspoon or a pinch of salt
1 1/2 teaspoon of cinnamon
1 teaspoon baking powder
2 cups of flour (I use cake flour and mine seems to come out without the heavy dense feel you sometimes get with regular flour) Or sift your regular flour first.
1 cup of nuts, walnuts or pecans. Tip* only half of my family prefers nuts in their banana bread, so I only add nuts to the last half of the mixture after I’ve cooked one pan of mini loaves.
Preheat your oven to 325°
The first thing I do is gather all my ingredients. Next whisk your dry ingredients together as set aside.
Next place your room temperature butter and bananas in the mixer bowl and mix on low until combined. Shut the mixer off and lift the paddle giving you access to the bowl. Next add in your moist/wet ingredients such as brown sugar, white sugar, buttermilk, eggs, and vanilla. Now turn your mixer back on low for just a few moments until combined. Don’t over mix.
Now you can once again raise the paddle giving you access to the mixing bowl again. Now you can add your dry ingredients which you’ve whisked together earlier. Once again mix on low just until combined. Do not try to whip it. This will cause your bread to be full of holes from too much air.
At this point you can pour your banana bread into a prepared bread pan, vegetable shorting and then flour coated or spray with non-stick spray if you prefer. Once your pan is ready gently pour your banana bread mixture into the pan and place in the oven for about 1 hour. About* because oven temps vary, please check by inserting a toothpick into the center of the loaf. If the toothpick comes out dry the loaf is done. Don’t forget to add nuts if needed.
Short cut** I used a brownie pan. The type for serving individual brownies, you know the type, which allows everyone to have a corner piece. The bake time was about 15 minutes! Makes 19 individual mini banana bread loaves. I actually believe this will be my preferred method of baking sweet bread in the future. Quick bake time. Easy to handle mini loaves. And last but not least no mess all over the counter as they take turns cutting a slice.
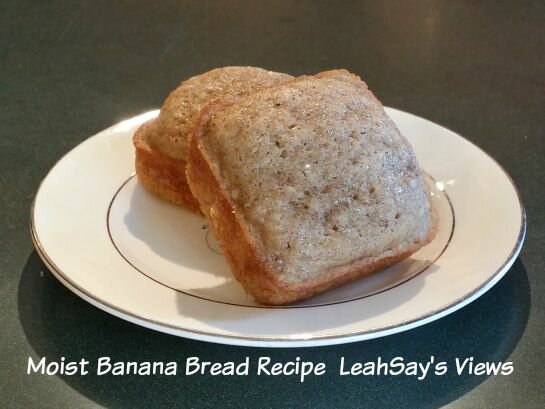
Store in a covered container in the refrigerator after the first day. If you have any left.
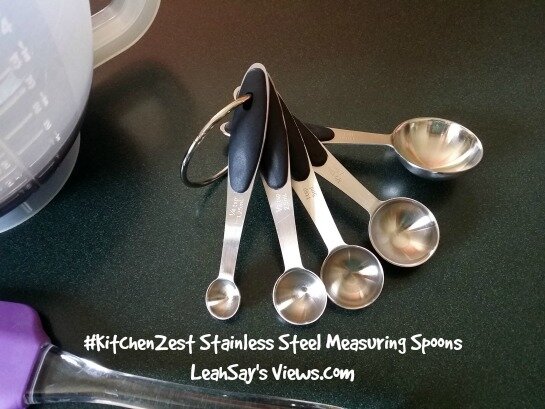
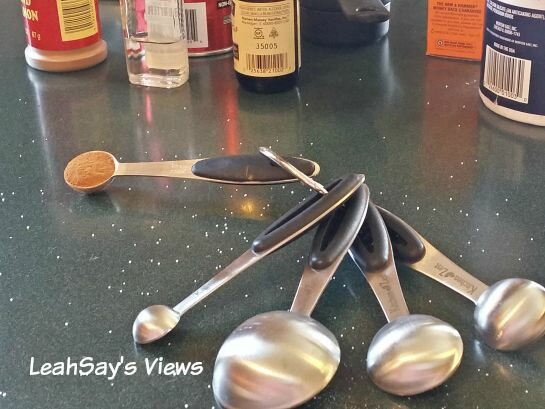
Do you see those shiny stainless steel measuring spoons in the picture above? Let me tell you a little about them.
The Measuring Spoons are by Kitchen Zest. The set is Manufactured S304 Stainless Steel with Engraved Measurements, and Soft Touch Ergonomic Handles, which all store nicely on the Stainless Steel Ring.
Let me tell you I can’t begin to say enough nice things about this set of measuring spoons.
I love the fact the measurements are engraved onto each spoon. No more worrying about faded or missing measurements.
The handy storage ring is FANTASTIC. Yes, I was forced to use bold type, because do you have nay idea how many time over the course of my life I’ve purchase sets of measuring spoons, only to reach into the drawer and pull out only a few from each set I’d previously purchased, all too often. The storage ring will ensure all the spoons go into the dishwasher and are placed back into my drawer each and every time. Not to mention I don’t have teenagers cooking in my kitchen anymore. That may or may not have anything to do with the missing spoons, bowls, towels etc.
Another fun fact, each spoon is smooth on the inside. Allowing you to make sure you can scrape out the contents and have the correct measurement. I don’t care for spoons or measuring cup with ridges on the inside. They are hard to scrape out and you never know if you have the proper amount called for.
Now for my personal favorite, I adore the Soft Touch Ergonomic Handles. They are perfect for someone who may have trouble gripping thing, but the grip is also nice because of the way the soon actually fits into your hand. It’s a bit bigger than a normal measuring spoon making it easy to grip, even when your hands are wet. As an arthritis sufferer. this fact alone would cause me to take a second look.
You can purchase a set for your kitchen at Amazon.com from Kitchen Zest. At this moment, it looks like they have sets with black or green soft touch ergonomic handles.*
I received a set of Kitchen Zest measuring spoons in exchange for a review through Tomoson.*
Thank You For Sharing, The Sharing Buttons Are Located At The Bottom Of Each Post And Along The Left Hand Side Of Feed.

Earn Cash Back While Shopping Online With Ebates! I Love the EBates App For My Phone & Laptop, The Ebates App Loads Automatically So I Never Forget To Click! Click The Picture Below For Details.*
*Note: facts and pictures may/may not be taken from the above mentioned site(s) or supplied by myself. Affiliate links included in this post.*
I Enjoy Reading Your Comments
comments


 73 Days Left
 39 Days Left
 8 Days Left
 22 Days Left
 8 Days Left
 10 Days Left


Leave a Reply
Be the First to Comment!